Preparation
Our Micro Challenge III group was made up by BorkaAnna,Angel, and myself.
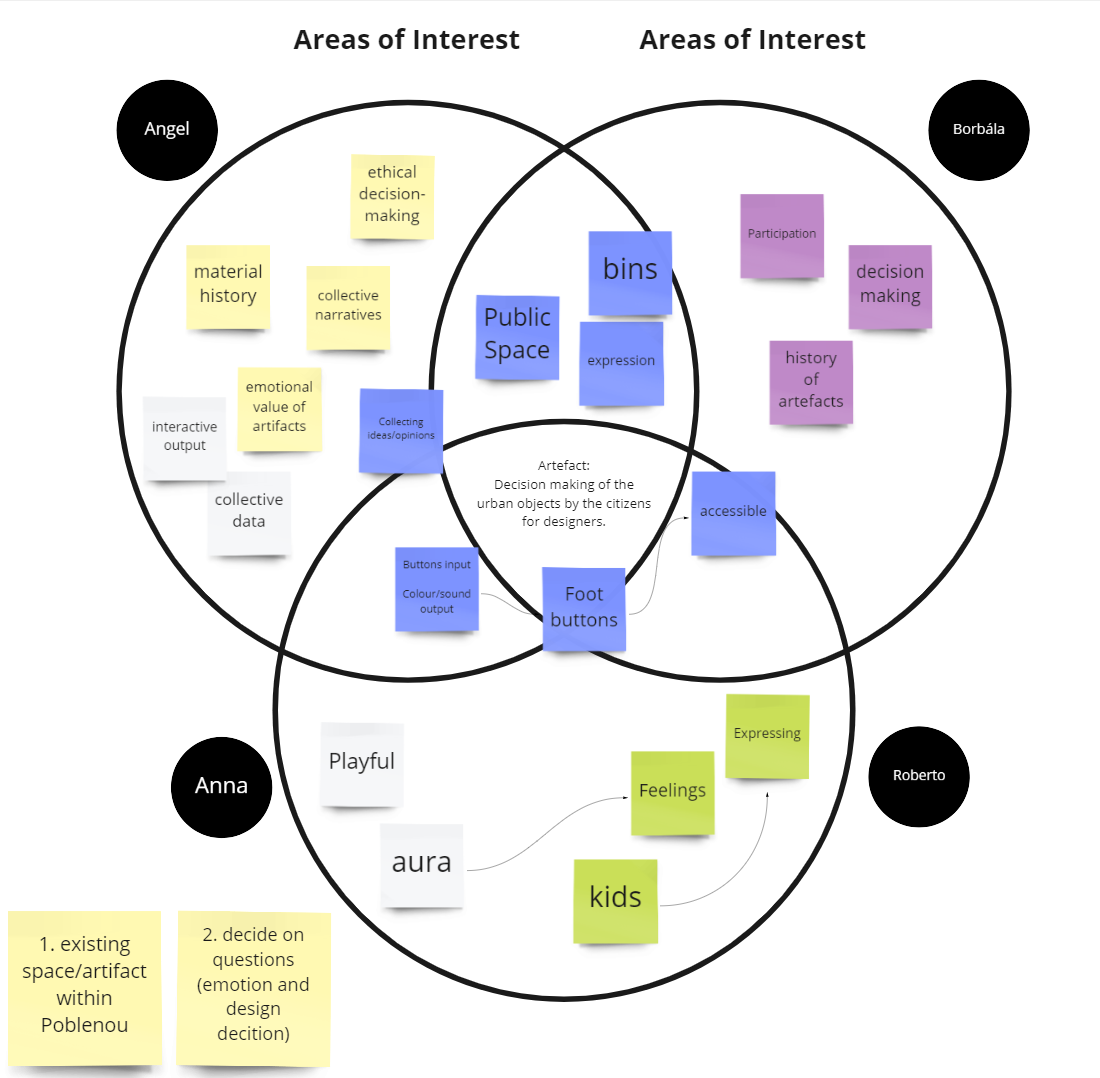
The premise for our project was focused on how public design is supposed to be democratic but they often don’t consider the community designed they are designing for. For example, these new garbage bins. How does the public actually feel about them, are they “good” or effective designs?
This served also as a great opportunity to learn about developing and implementing data recollection techniques in real time, it also led us to discuss how to make this data recollection more "ethical" by sharing the findings immediately with the surveyed parts. We wanted to make a technology that could readily record and reflect citizens' thoughts through a designed object. This may assist the designer or city administration in comprehending and improving depending on public user comments.
Implementation
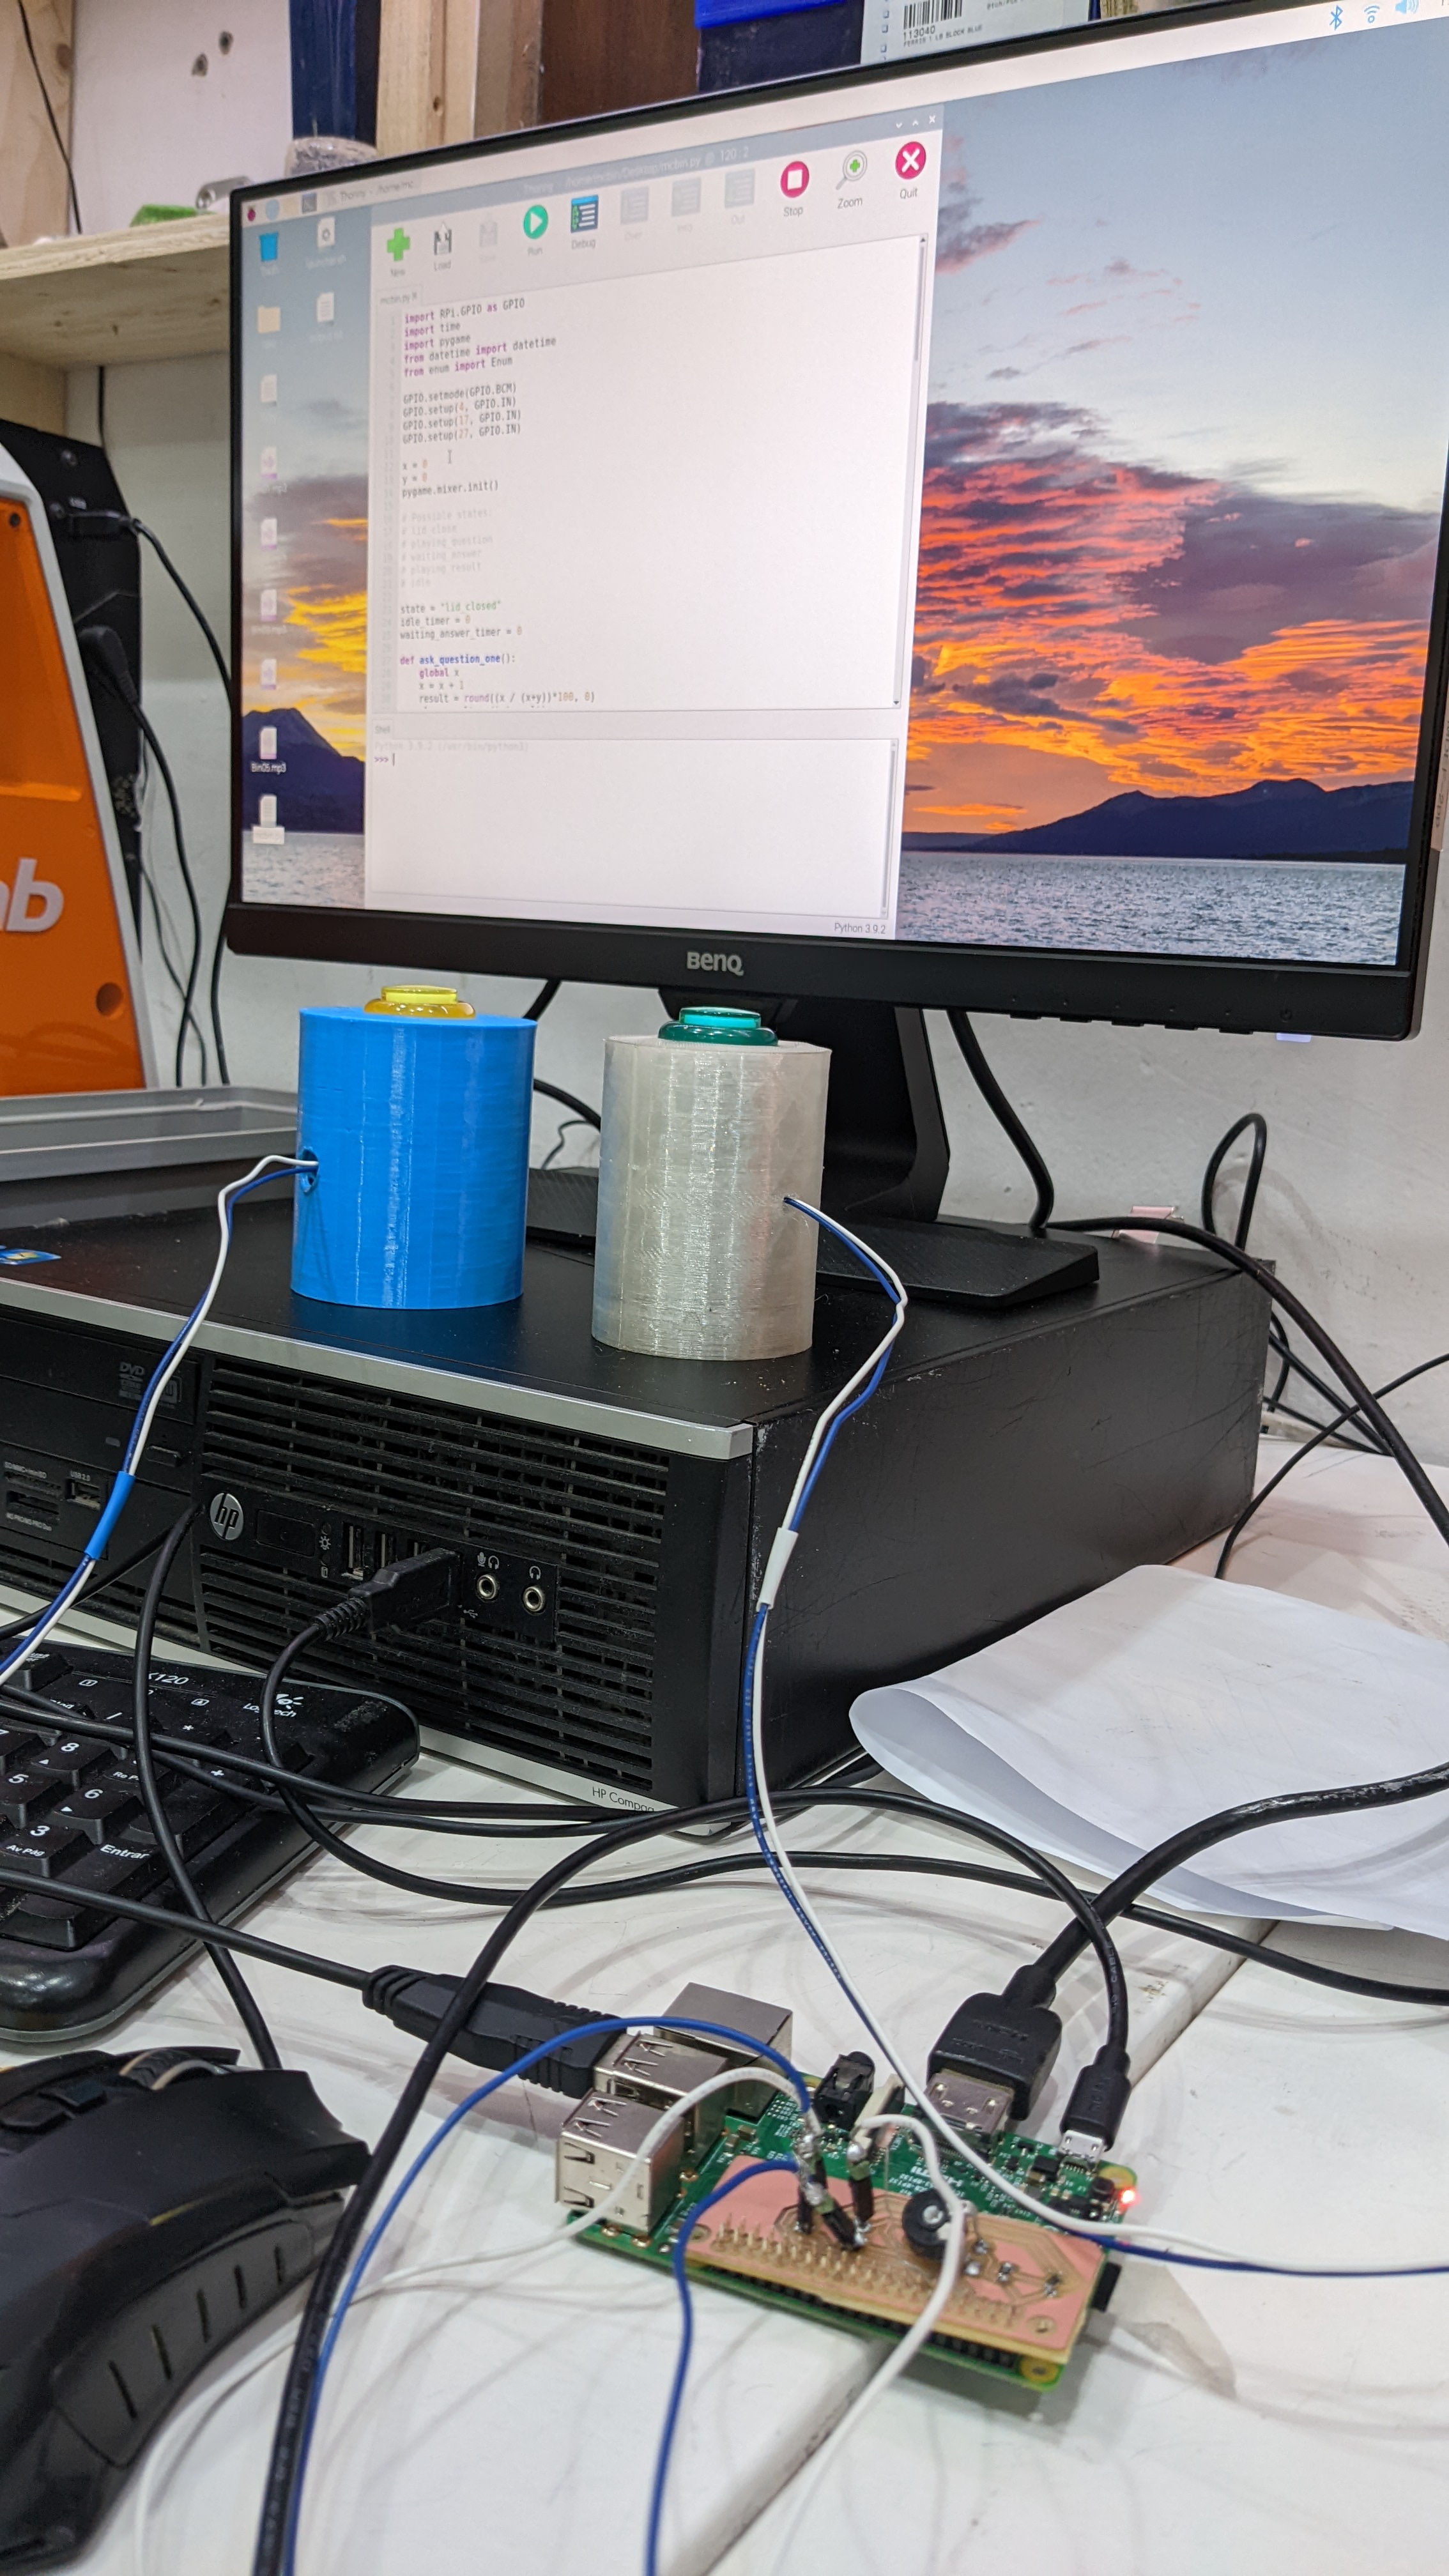
Because we knew people wouldn't want to touch the garbage can, we chose against using capacitive sensors in the implementation. We also removed the IR sensors since we figured people wouldn't want to spend more time than required in front of the bins or when dumping trash out. I assisted with the design of the user experience and the voting system's activation (with the initial press of the pedal to throw away the garbage). My major objective was to make the procedure as fluid and quick as feasible by combining the voting process with the garbage disposal process.
To make voting as simple as possible, we chose to mount the voting mechanism (yes/no buttons) on the same pedals that the citizen "user" would be using to dispose of rubbish. The original prompt elicited mixed reactions, but we liked the notion of the bin being unaffected from the outside and the query being activated by voice when the citizen pressed the pedal. Finally, we all decided that voice activation would be more spontaneous and enjoyable in the end. I drew a drawing for the pedal buttons, which would cover both sides (left and right) of the pedal while fitting into the sides.
My role was to figure out the wiring of the electronics with Angel's help on the breadboard and design the PCB. I stuck around for the coding initially but it got very advanced very quickly and thus we left that task to Anna and Pietro. Angel and I created the script for the survey and recorded it. We then got all the components working (buttons, speakers, phototransistor) and cut a box where the device would be located.
The result
Learning Outcomes
Some key learning points would be:
- Start coding with a good flowchart
- Better to do something small very well than too much poorly
- There is so so so much one can do with a little Raspberry Pi!!
To find the documentation, description and reflections, as well as the open source fabrication files click here >> Repositoyr